


As of August 15, 2025, Bluesky had approximately 38.26 million registered users and around 4.1 million daily active users.
If you want to grow your social presence further, focusing on Bluesky is a must. However, it might be a bit hard to post on Bluesky, Twitter (X), and Threads at the same time.
That’s why we have built a powerful Bluesky scheduler that works right out of the box.
How to add Bluesky accounts in WordPress
In order to add your Bluesky account to FS Poster, first go into the FS Poster dashboard and navigate to the “Channels” tab. This section is specifically designed for managing and adding various social media accounts, including Bluesky, to your FS Poster setup.
By navigating to this tab, you'll be able to initiate the process of connecting your Bluesky profile, enabling FS Poster to efficiently manage your social media presence across multiple platforms.
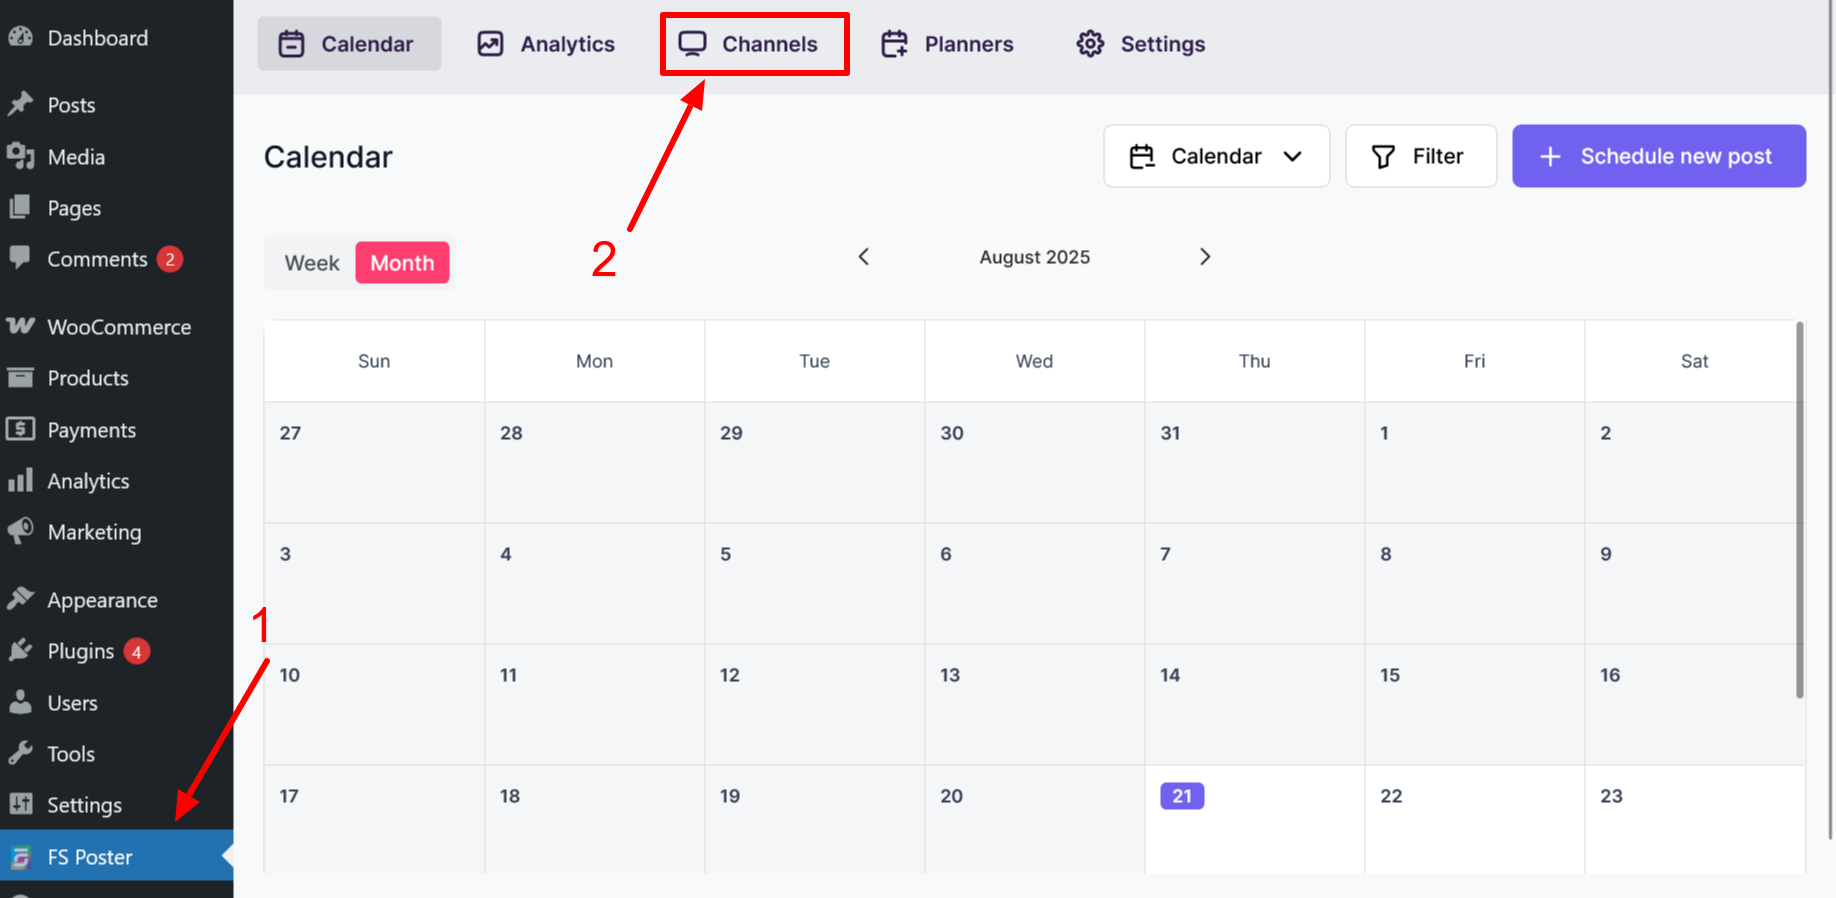
After you click, a page will open showing all the channels you have already added. From here, you can easily see which accounts are connected. To add a new one, simply click the “Add Channel” button.
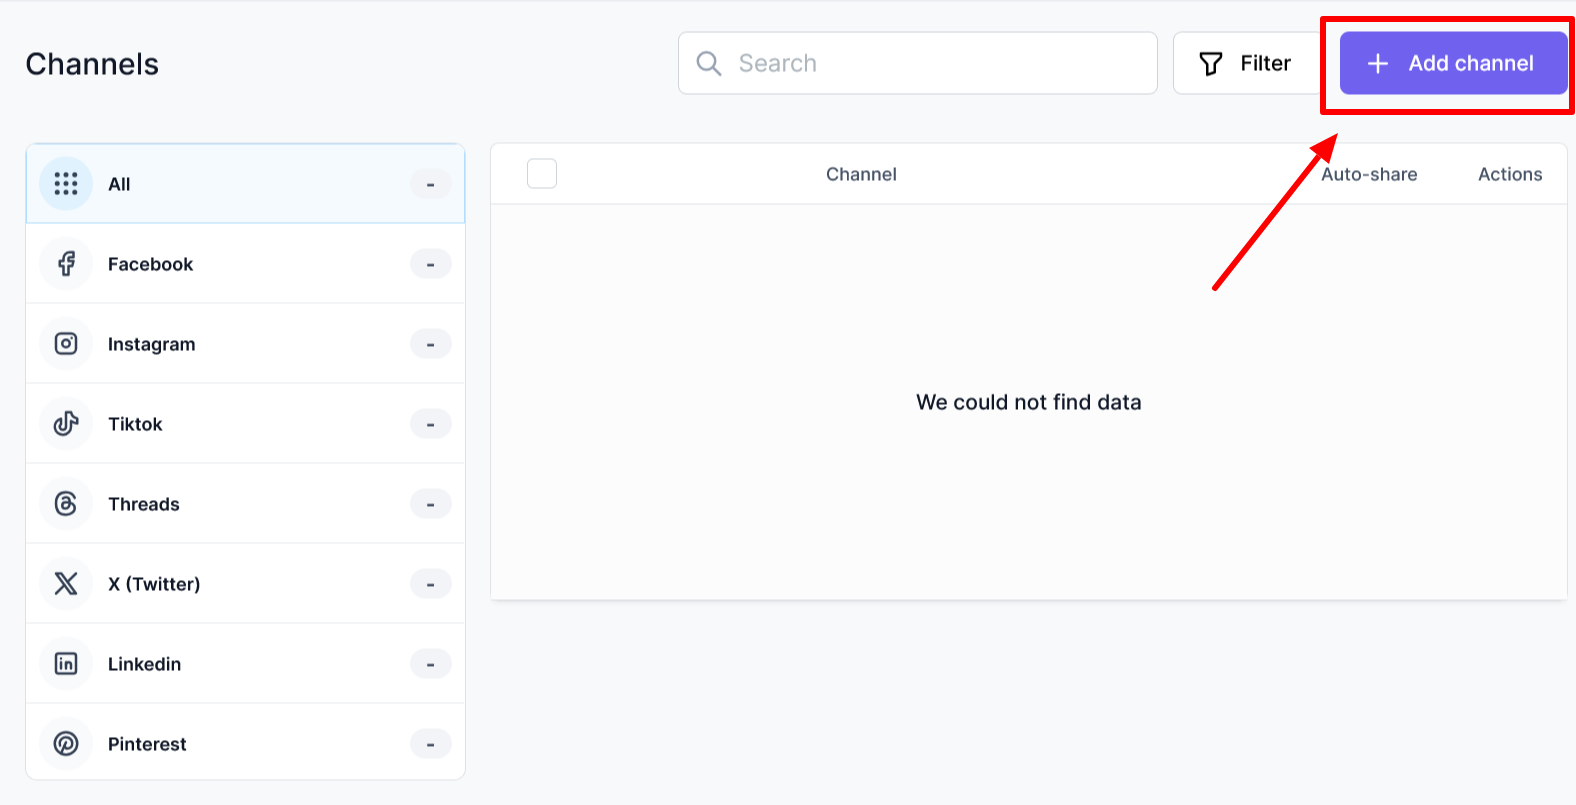
At the bottom of the list, you’ll see the Bluesky icon. Simply click on it to start connecting your account.

Once you click on the button the handle and Bluesky App Password section will open.
For the handle, you need to input your username. You can find your username in your profile.

To generate an app password, navigate to this link and click on the “Add App Password”.
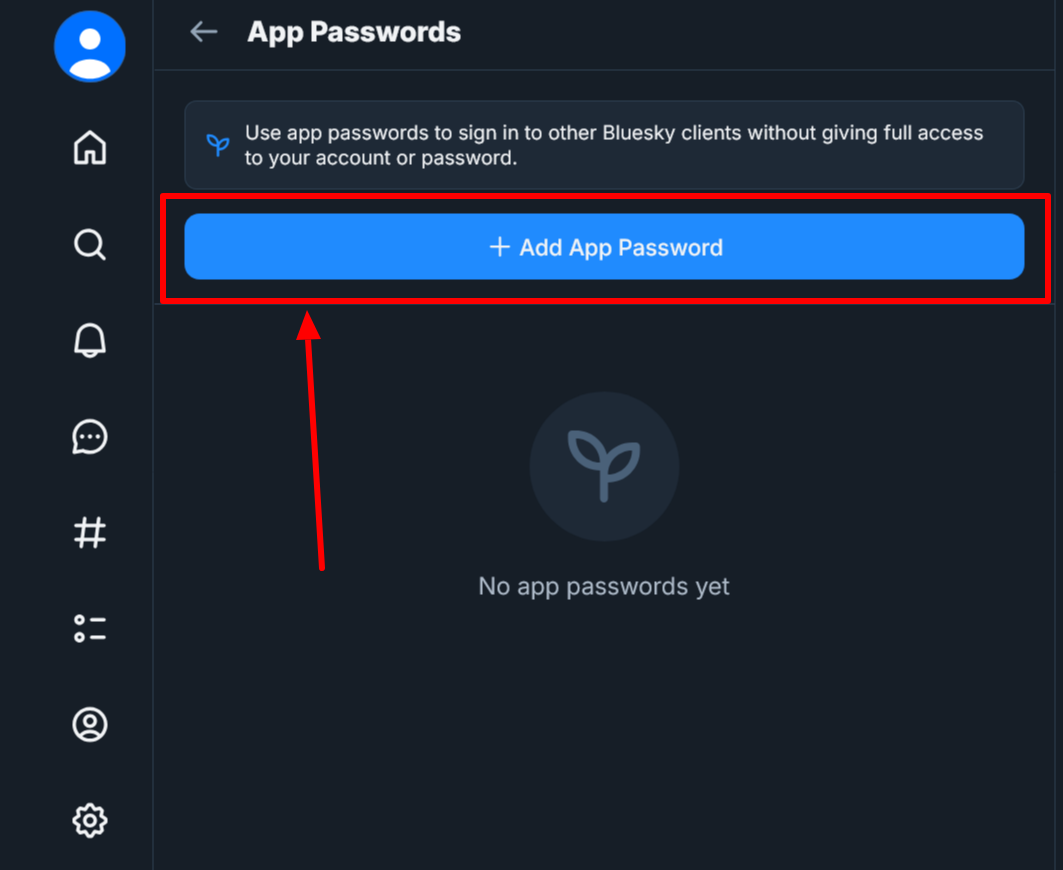
After you obtained the password from here, add it to the previous field and press continue. If you want, you can also enable proxies.
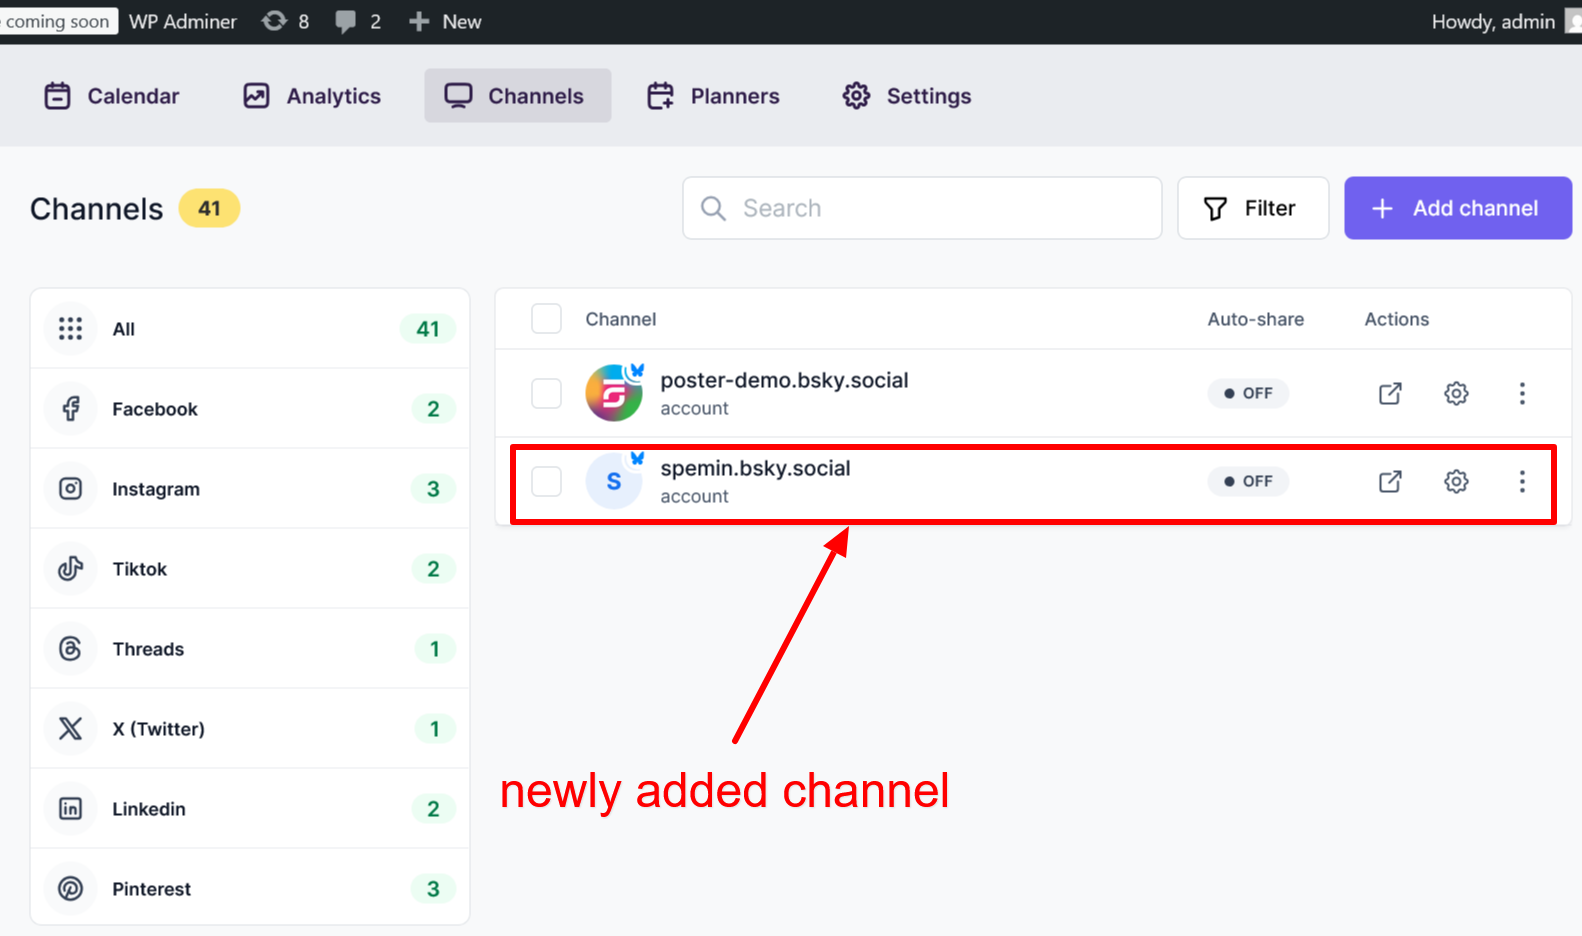
Now, we have successfully added Bluesky channel and we can schedule our posts.
How to schedule posts on Bluesky from WordPress
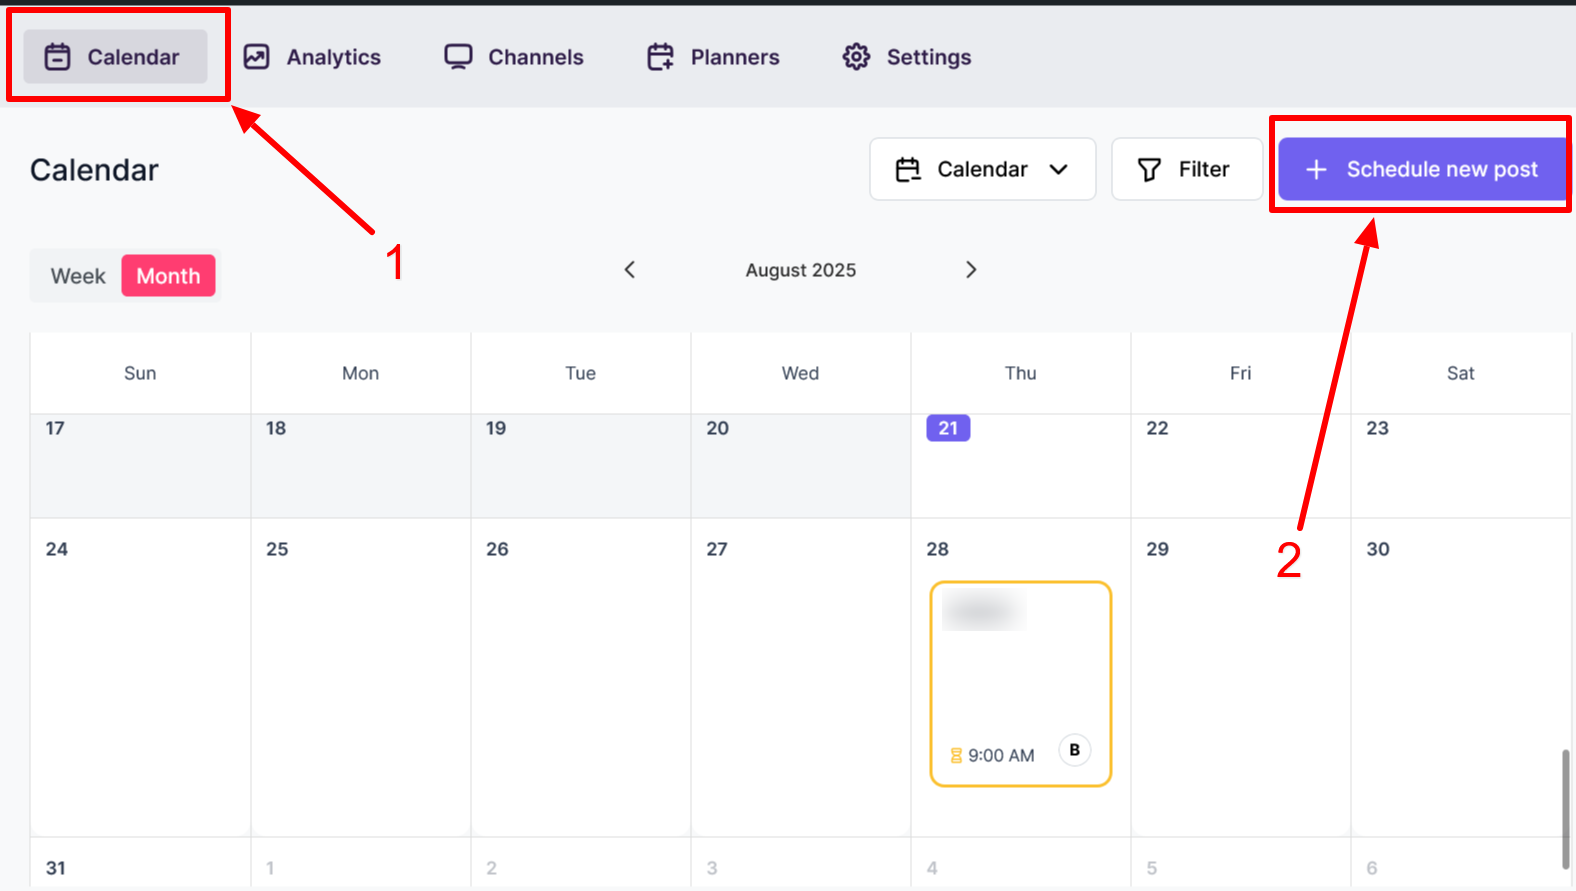
In order to schedule Bluesky posts from WordPress, navigate to the calendar tab and click “Schedule new post” button.
Once you click on the button, a new window will open saying you need to choose a channel.
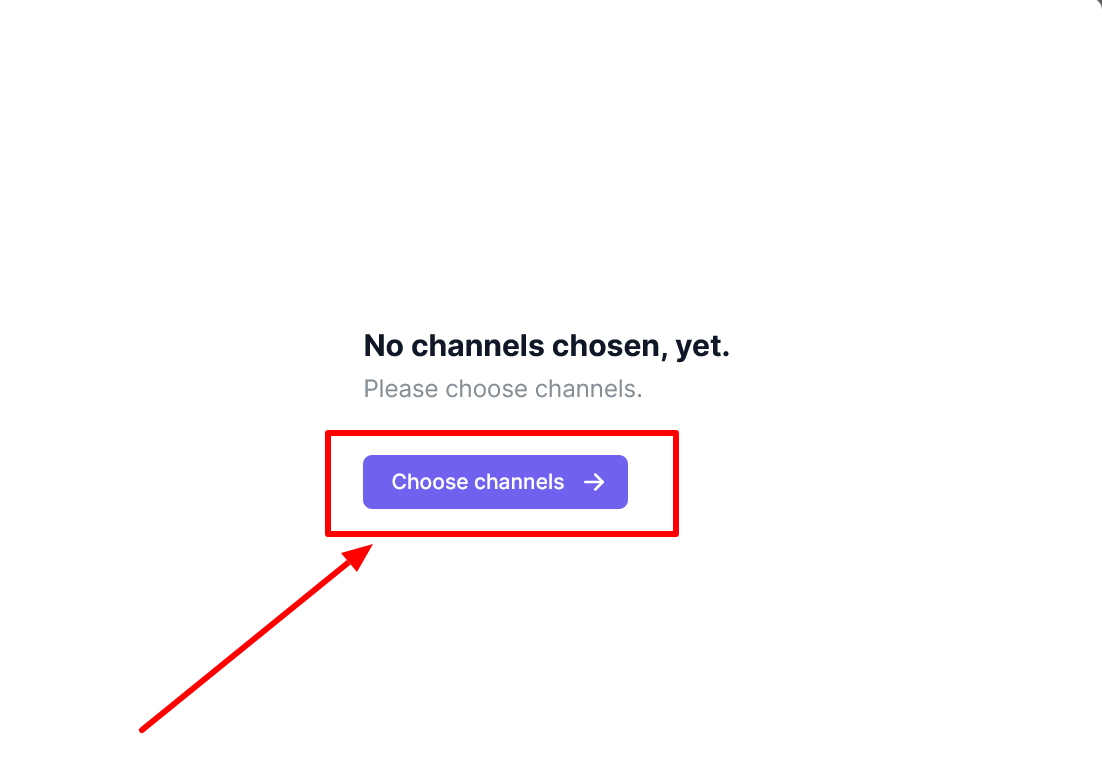
Once you've completed the initial setup, a new window will appear, presenting a comprehensive list of all the social media channels you have integrated with the system. This window serves as your central hub for managing where your content will be shared.
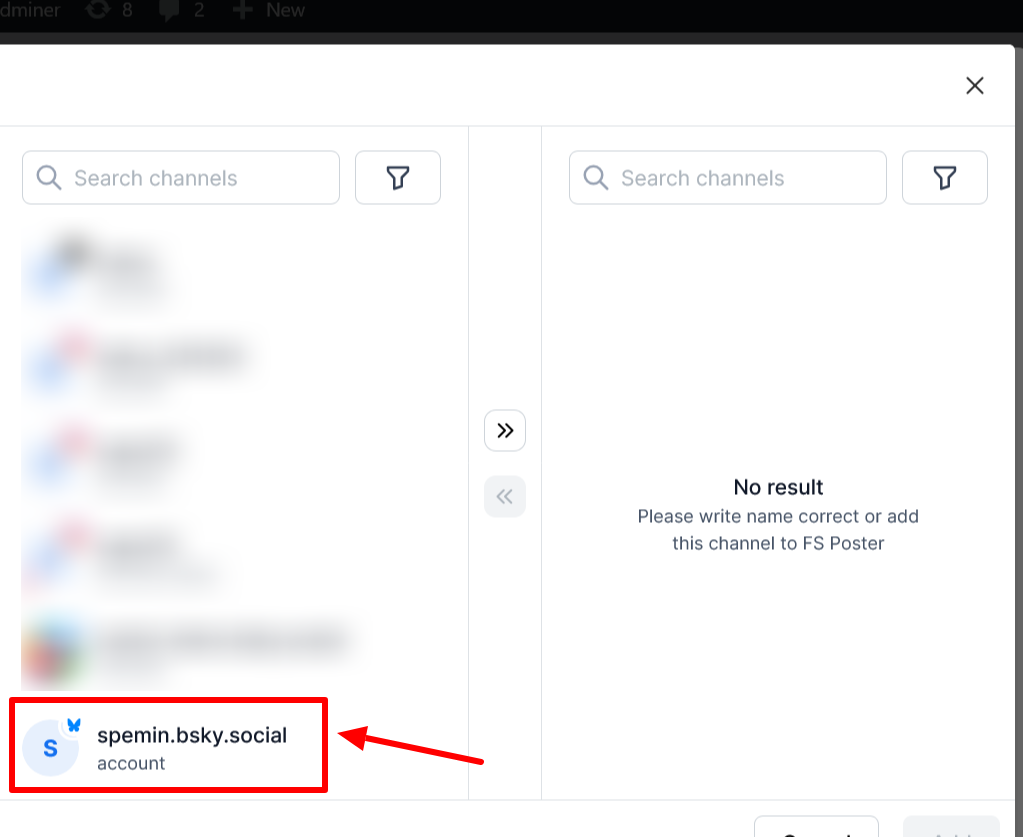
To proceed, select the specific channels to which you wish to publish your content. As you choose each desired channel, it will automatically transition from the left side of the window (the list of all available channels) to the right side (the list of selected channels). This visual separation allows you to easily confirm which channels are targeted for your posts.
After clicking the “Add” button, the system will automatically open the post sharing panel. This panel allows you to compose and customize your post before publishing.
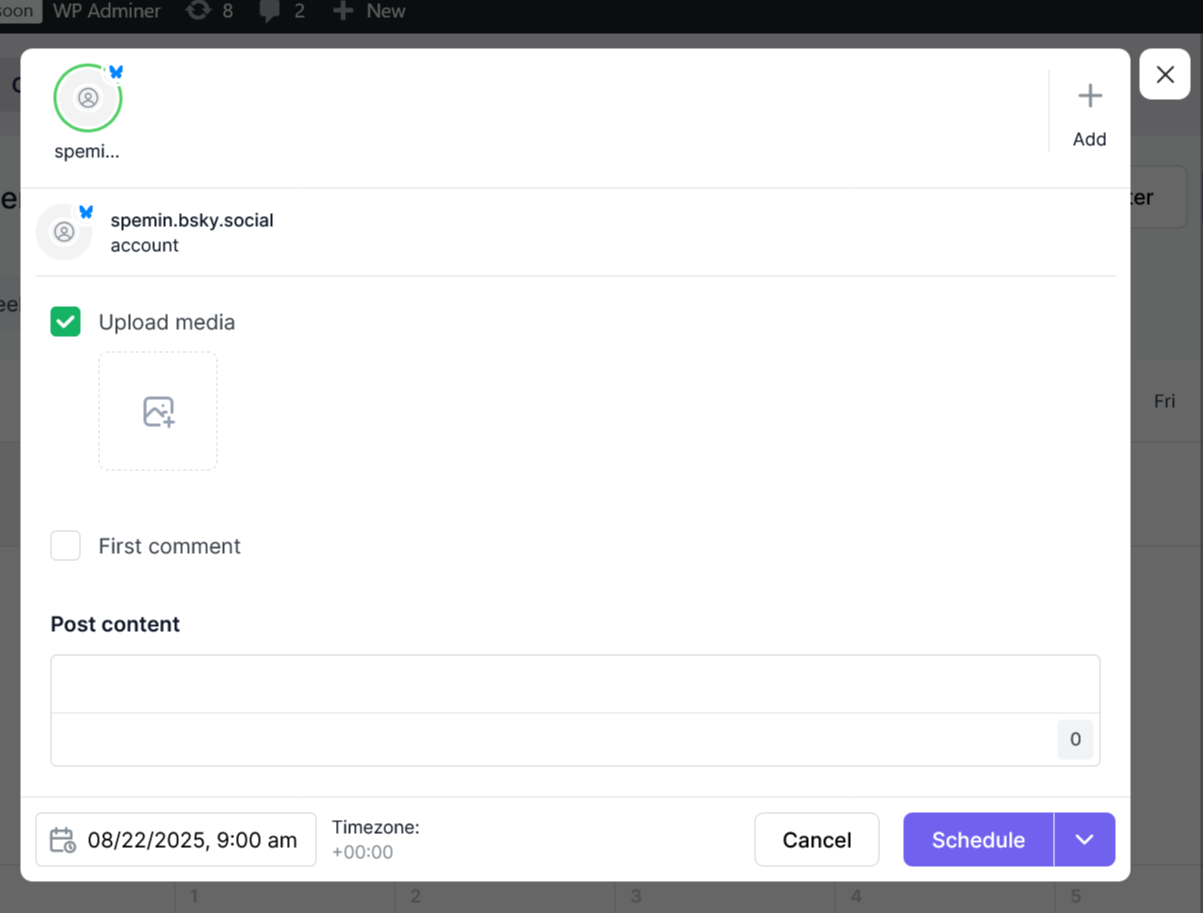
From here, you can add text, attach images or videos, include links, and select the social media accounts or groups where you want the post to appear. You’ll also see scheduling options if you prefer to publish the post at a later time, along with preview features to check how it will look once shared.
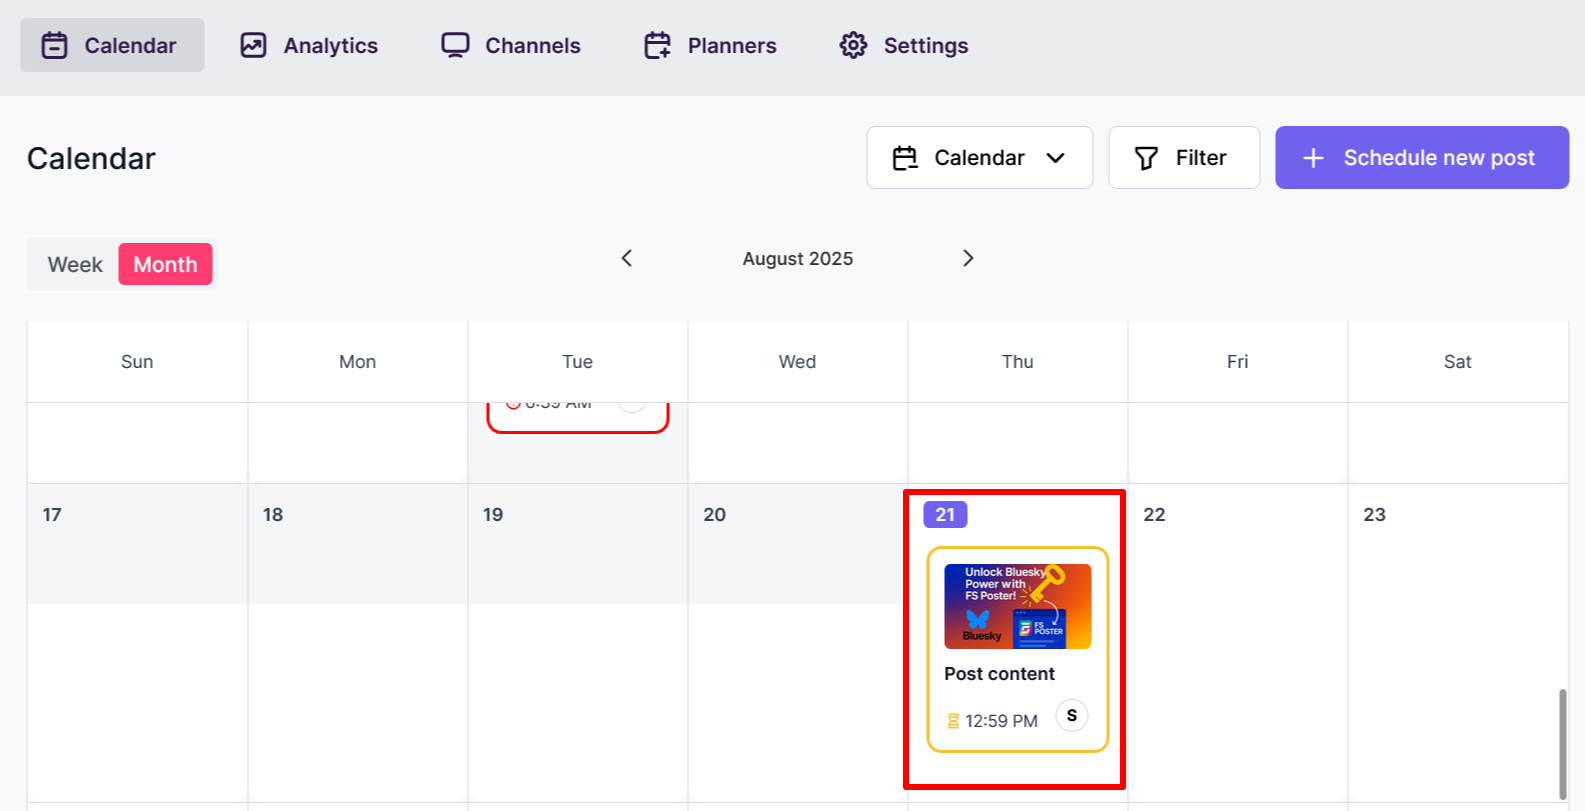
After sharing your content will appear in the calendar for the day it is scheduled. You can also choose to post Bluesky posts directly from the FS Poster dashboard. If you choose to do so, it will take around 1-2 minutes due to background processing and execution.
When you first publish your content in FS Poster, a small time hourglass icon will show in the bottom right corner. After it is published, it will turn into a green checkmark button.
What are the benefits of using FS Poster to schedule Bluesky posts?
Well, first of all if you have some content you want to share on Bluesky, you probably want to share to Twitter (X) and/or to Threads as well. Luckily, FS Poster supports both of these platforms, so you can add them as channels to the sharing dashboard and share your content simultaneously on all three.
On top of that, scheduling your Bluesky posts makes things a lot easier and more effective. First of all, most of the active times on social media platforms are usually after working hours, so if you want to reach people when they are most available, you should either carry work to home, or use a scheduling tool such as FS Poster.
Plus, instead of posting by hand every day, you can create all your content at once and let it go live automatically. This keeps your profile active and consistent, which helps your audience know when to expect new posts.
It also gives you more time to focus on writing better content and connecting with people, rather than worrying about timing. Many scheduling tools also let you share the same post on other platforms, check when your followers are most active, and even reuse your best posts. In short, it’s a simple way to save time, stay organized, and grow your presence on Bluesky.
Conclusion
In conclusion, FS Poster makes managing your Bluesky presence effortless. By scheduling posts, cross-sharing to other platforms, and keeping a consistent flow of content, you save time while reaching your audience at the right moments. It’s a smart, simple way to stay active, organized, and grow your social presence without extra hassle.
Turn your WordPress content into scheduled social posts
See how FS Poster works![How to Auto-Post to Facebook from WordPress FREE [A Complete Guide]](https://www.fs-poster.com/storage/posts/b873807f0a20f74109c0a2b68ea26a6b-1778158768.webp?v=1778158768)


![How to Auto-Post to Twitter from WordPress [A complete guide]](https://www.fs-poster.com/storage/posts/1ae0d8eb84109c8932f33ab37ae4a100-1778158769.webp?v=1778158769)
