En
Option 1: Create your personal App and add your accounts using the personal App (Recommended);
Option 2: Use the Cookie method to add your account to the plugin.
- To create an App, go to the X Developers Console page and agree to the developer agreement & policy and click the Submit button.
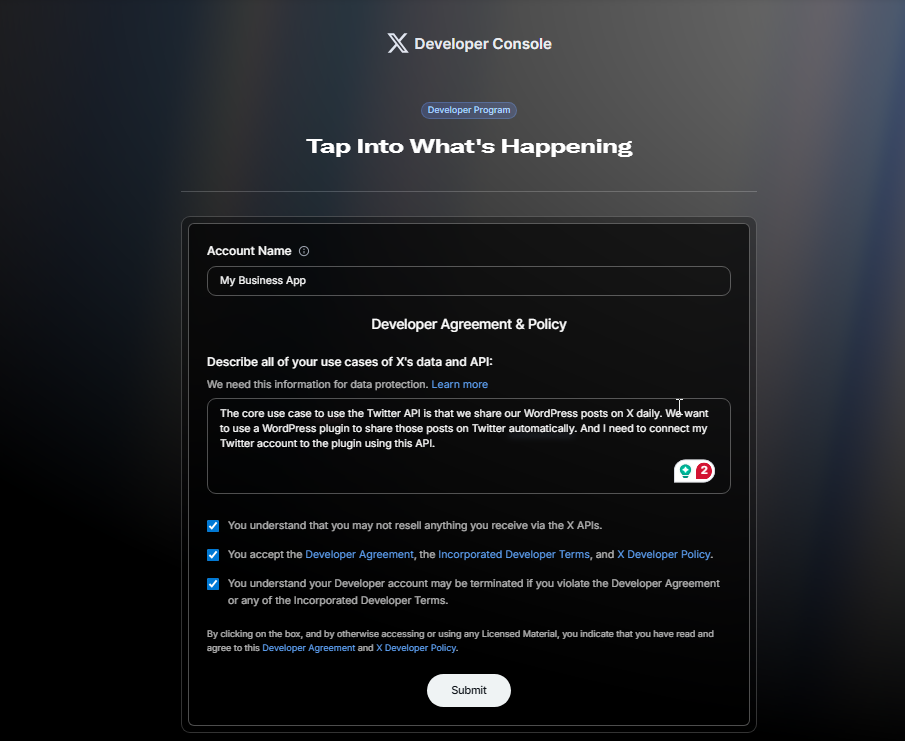
- You can copy and paste the use case provided below:
The core use case for using the Twitter API is that we share our WordPress posts on Twitter daily. We want to use a WordPress plugin to share those posts on Twitter automatically. And I need to connect my Twitter account to the plugin using this API.
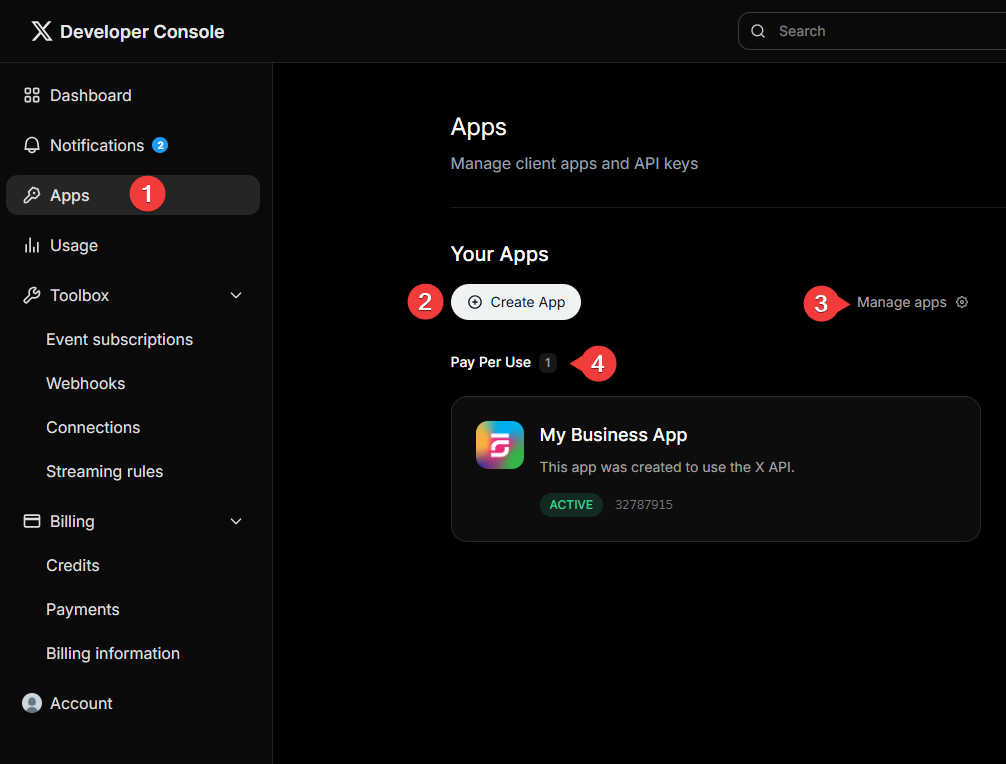
- Now you can manage and create Apps in the Apps menu.
- You need to click the Manage Apps button and move the package to the Apy Per Use if it is not selected by default.
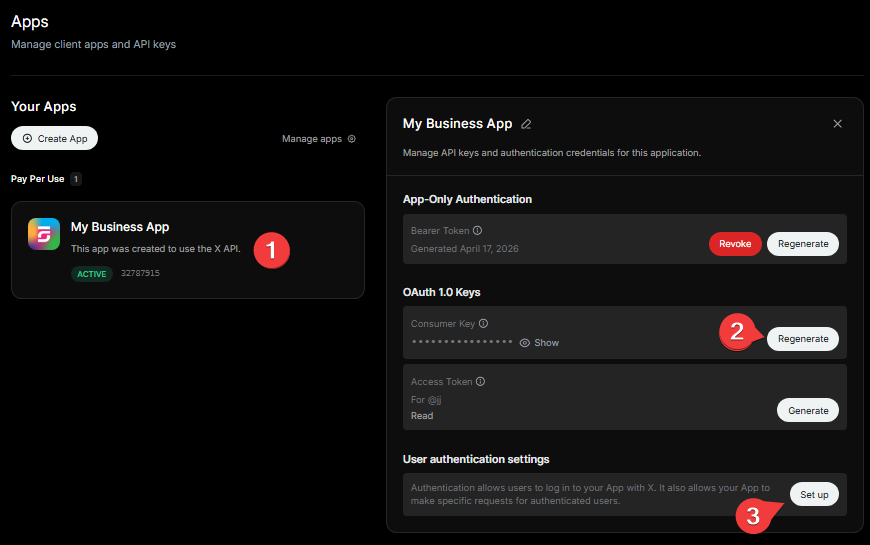
- You can click the App name to generate credentials if you have not saved them and set up user authentication settings.
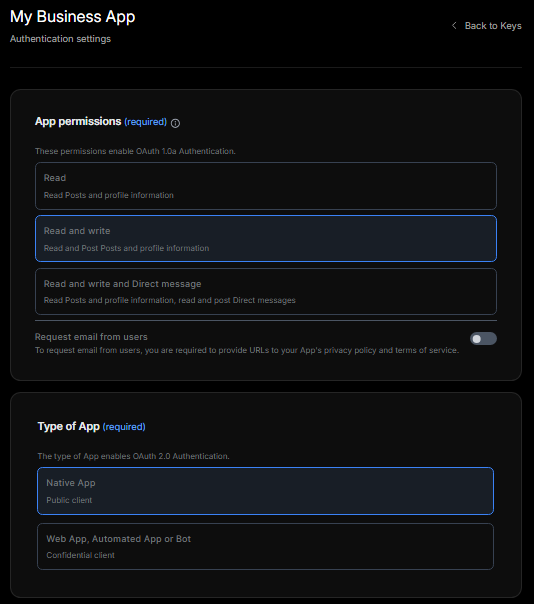
- Select the App permission and type.
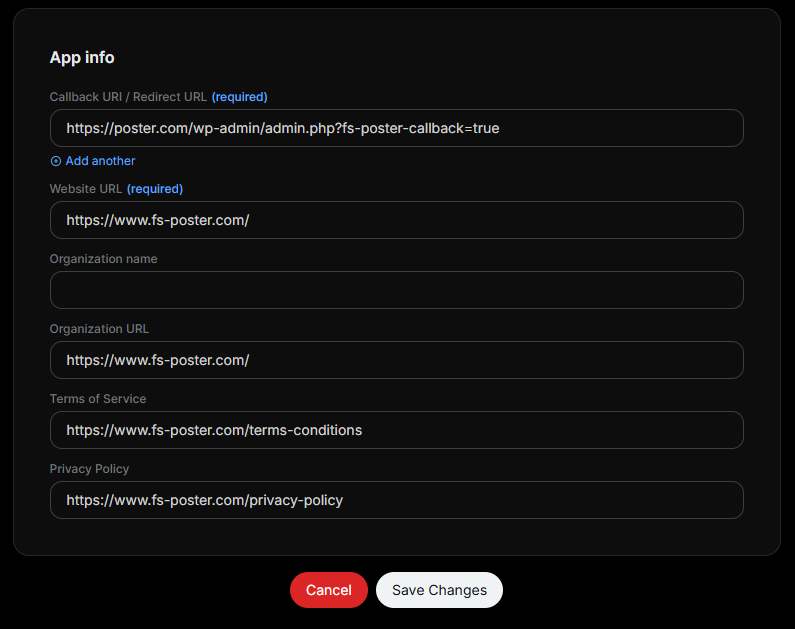
- Then copy your redirect URL from the Apps tab of the Plugin.
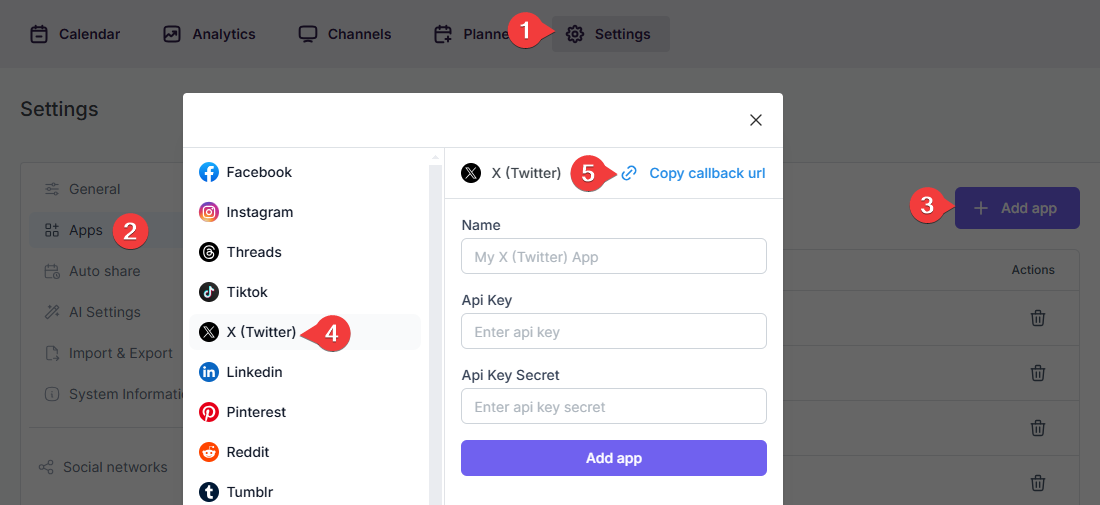
- Paste it to the App info => Callback / Redirect URL section and enter the required website URLs.
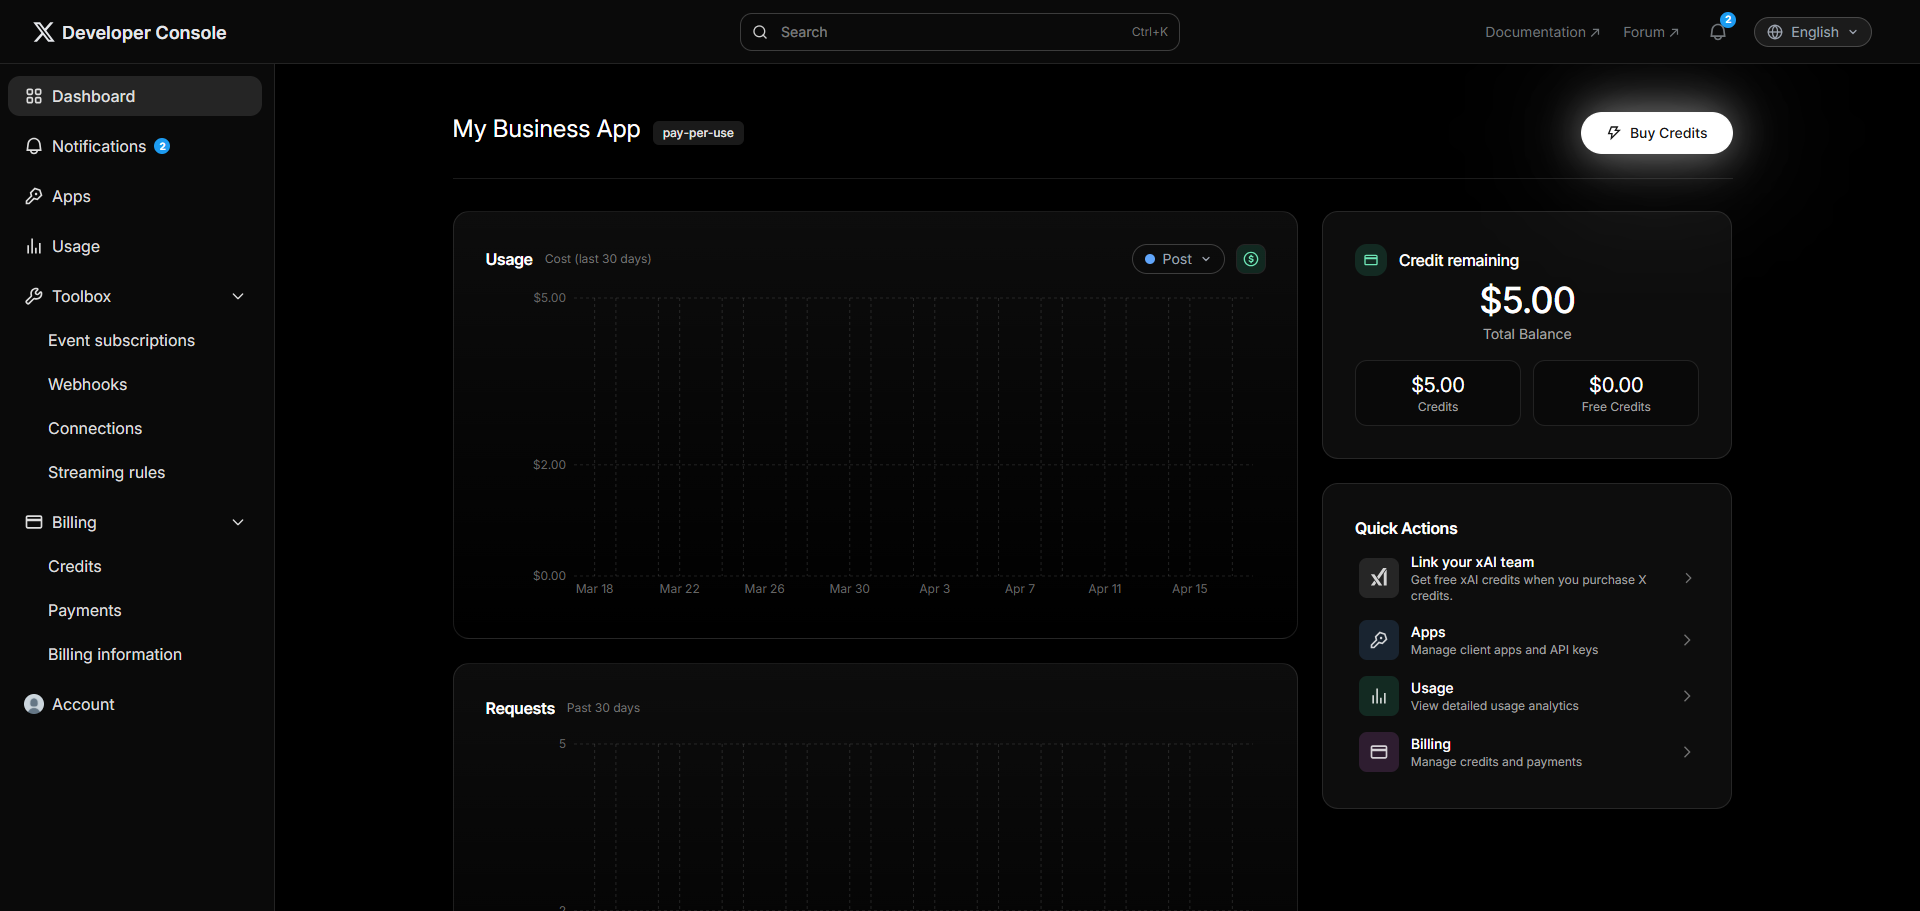
- Add credit to your account; otherwise, you will not be able to share posts on X using its API.
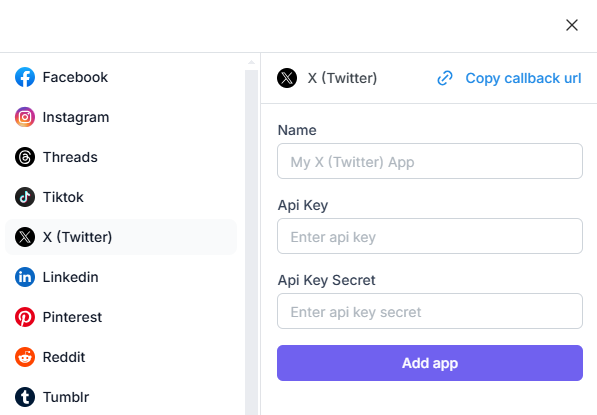
- Now you can give a name for the app to recognize it and add the App credentials to the plugin.
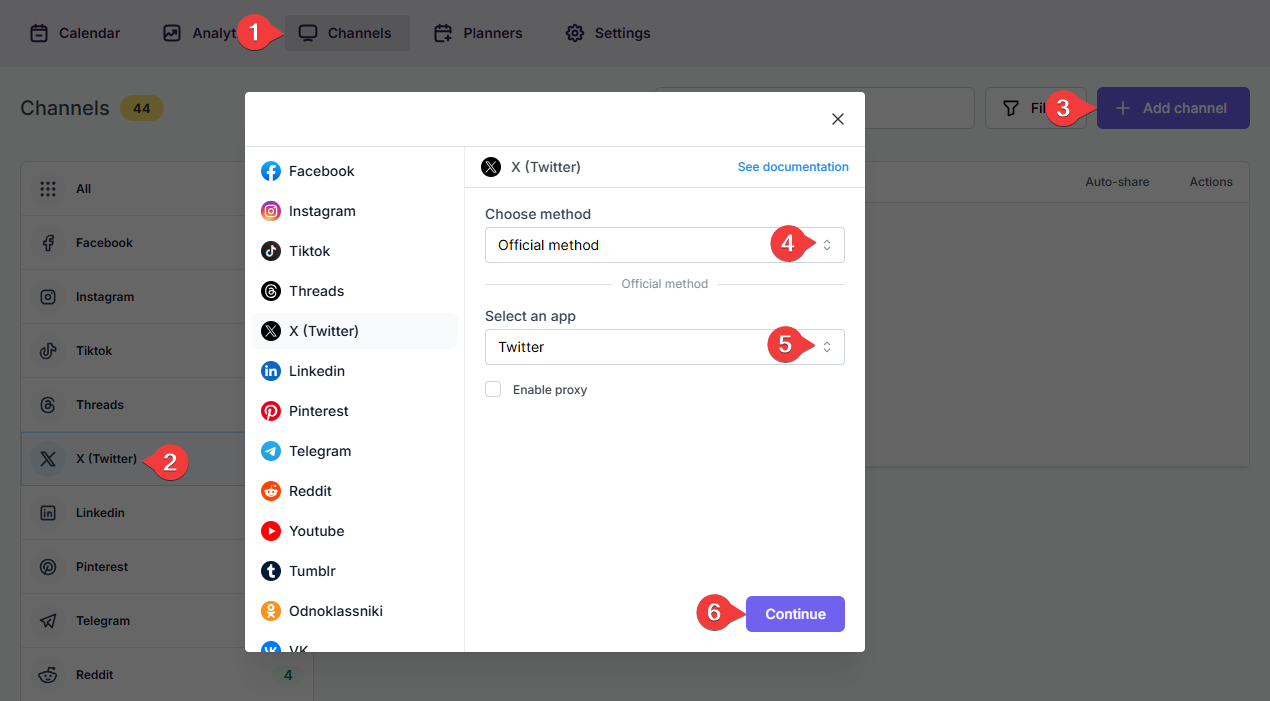
- Go to FS Poster > Channels > X (Twitter) menu and click the Add channel button;
- Select your App from the list and click the Continue button.
- You have the option to add the account with a Prxoy as well;
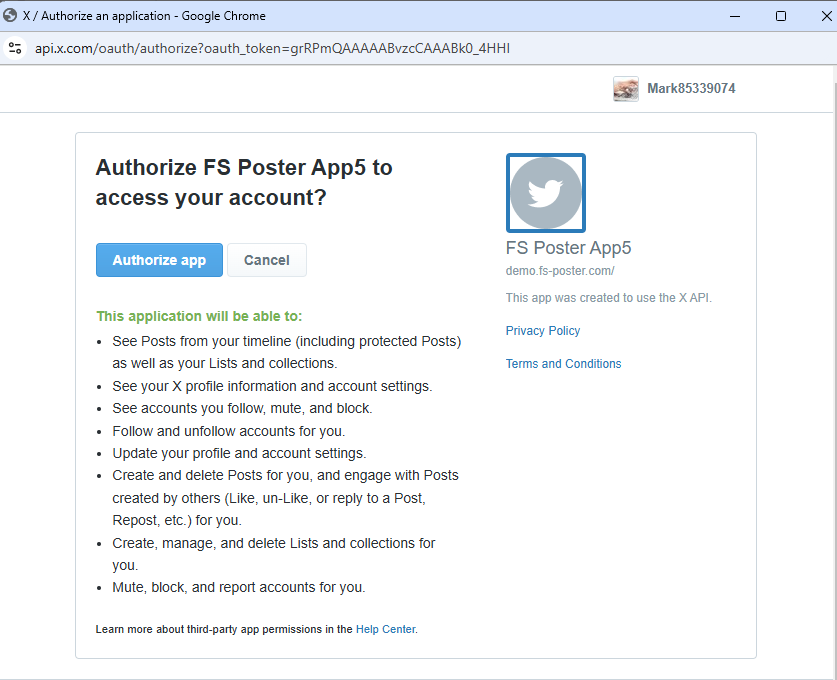
- Once the X authorization page is opened, click the Authorize App button to add the account to the plugin. The page will display the account name currently logged into the browser. If this is not the account you want to add to the plugin, or if you wish to add a different account, log into the desired account in a new browser tab.
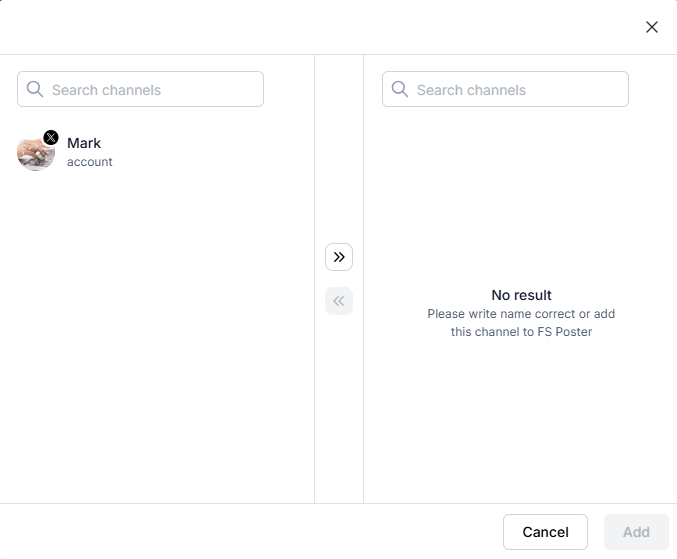
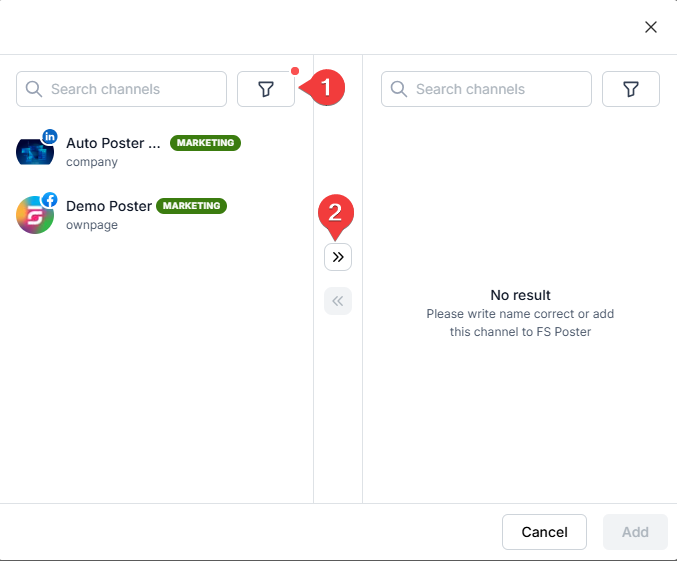
- Click the channel or the >> button to add it to the plugin;
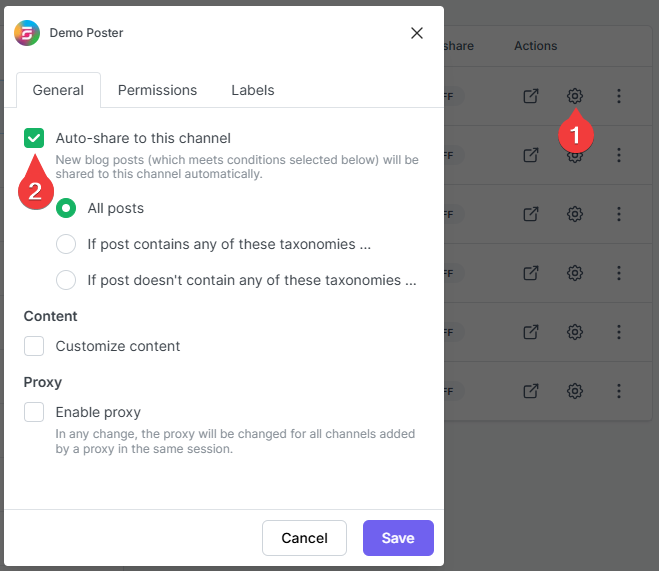
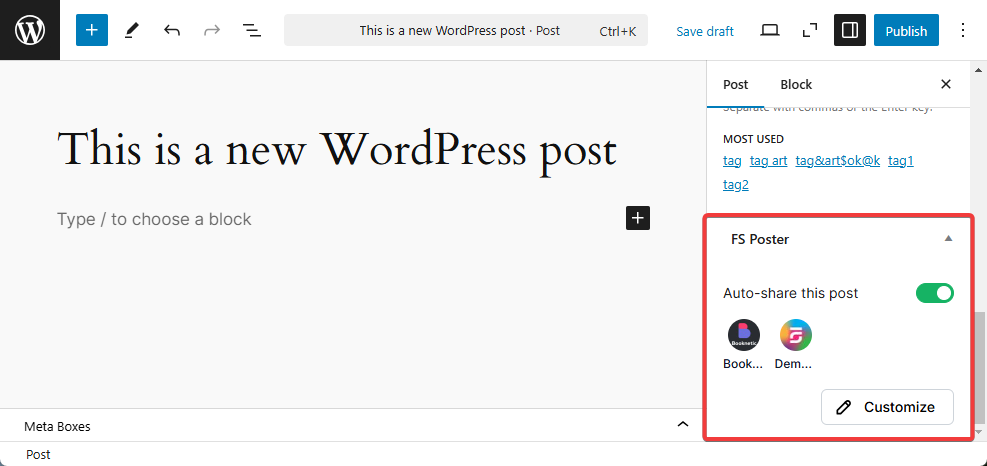
- Activate your channels to share posts on social networks automatically whenever a new WordPress post is published on your website. If you do not activate channels, you need to add them to the FS Poster section whenever you want to share specific posts on your social network accounts;
- You can also activate channels conditionally by selecting specific taxonomies to share specific posts or not share specific posts on particular channels. This will apply to only auto-posts;
- The Customize content option allows you to assign specific content for this specific channel which will override the content you specifically in the social network settings;
- Moreover, you can enable proxy or edit the proxy credentials without reauthorizing the channel to the plugin;
- Since channels are activated, they will appear on the FS Poster section when publishing a new WordPress post. Once the post is published, the plugin will share the post on these channels automatically;
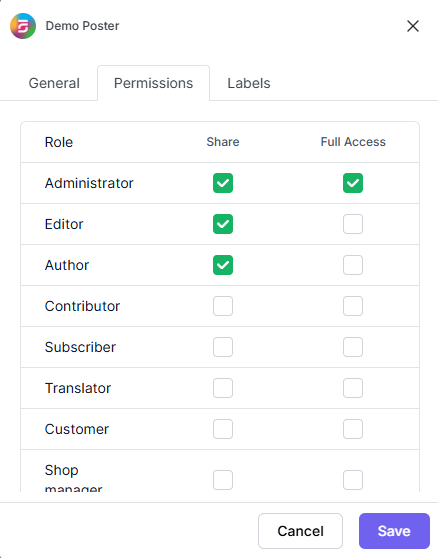
- In the Permissions tab, you can permit other WordPress users to use the channels in their FS Poster dashboard. You can either allow them to only share posts or give them full access to manage the channel, and edit its settings;
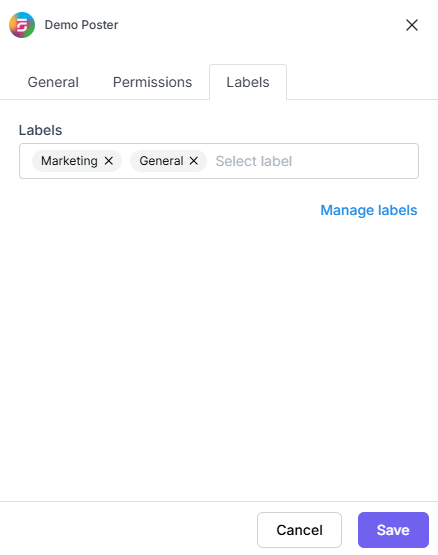
- In the Labels tab, you can organize channels into specific groups, making it easier to add a group of channels to the Planners or Schedules instead of adding them one by one.
- Now, you can easily filter channels by label and click the >> button to add them all at once for sharing;
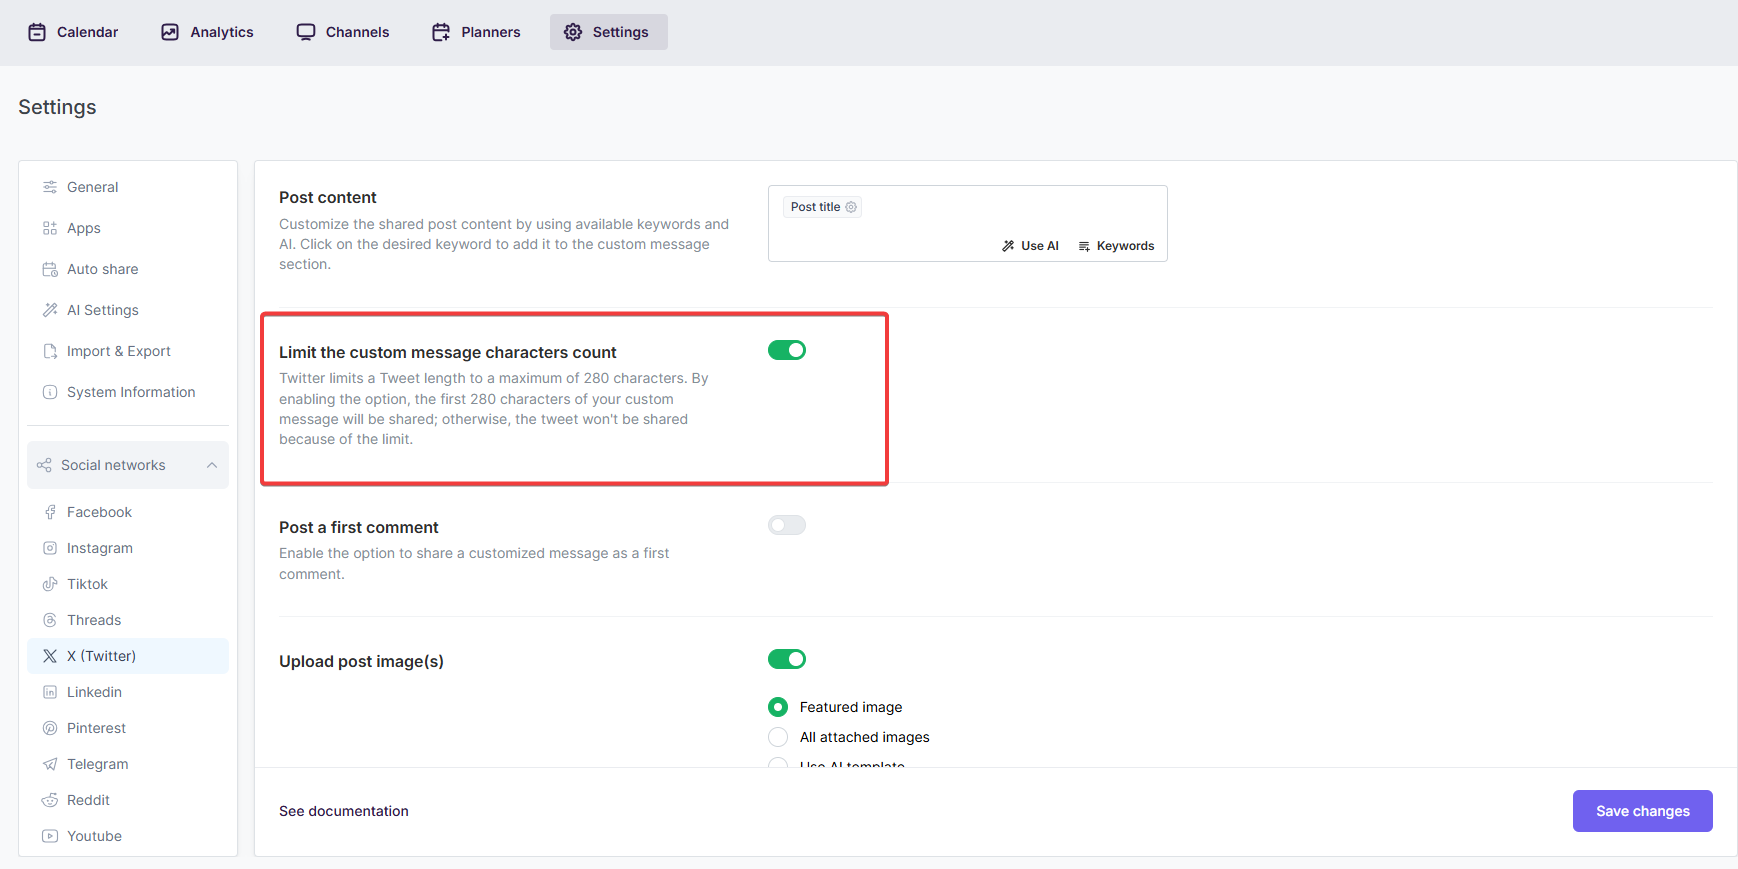
Because Twitter supports only 280 characters for regular accounts, sharing posts on Twitter works under certain conditions:
If the shared post contains some text and an image or a video, the first 280 characters are shared with the image or video.
If the post contains some text and a link, the exceeded text is cut from the text, but the entire link is shared.
If the link length is 280+, the link is deleted from the post, and only the text is shared.
If you have a premium account, you can disable the option to share full text:
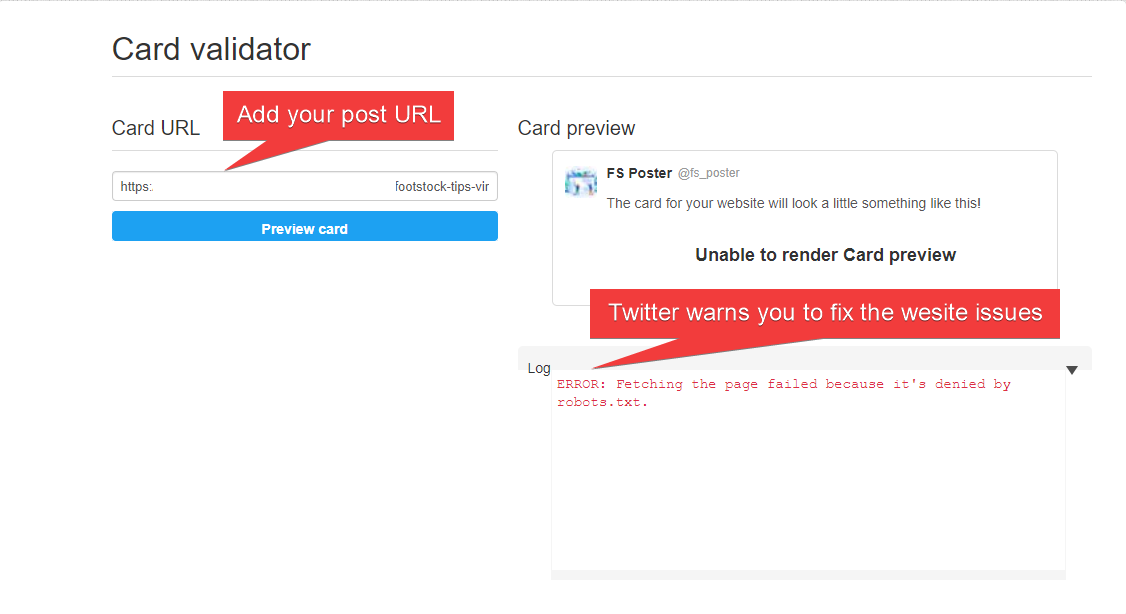
- You can set the plugin to share your post URL as a link card view or upload post images. If the post images are not visible on Facebook, you can debug your website on the Twitter developer page to see the reason behind the issue.
The cookie method is private and works for 70% of the accounts. Depending on the country and account security level, it might not work for all accounts. If you use this method and spam, Twitter might suspend your account or terminate your account session, which means you will need to add your account to the plugin again. Some advice below will make your account less likely to be blocked:
Follow the steps to add an account using the cookie method:
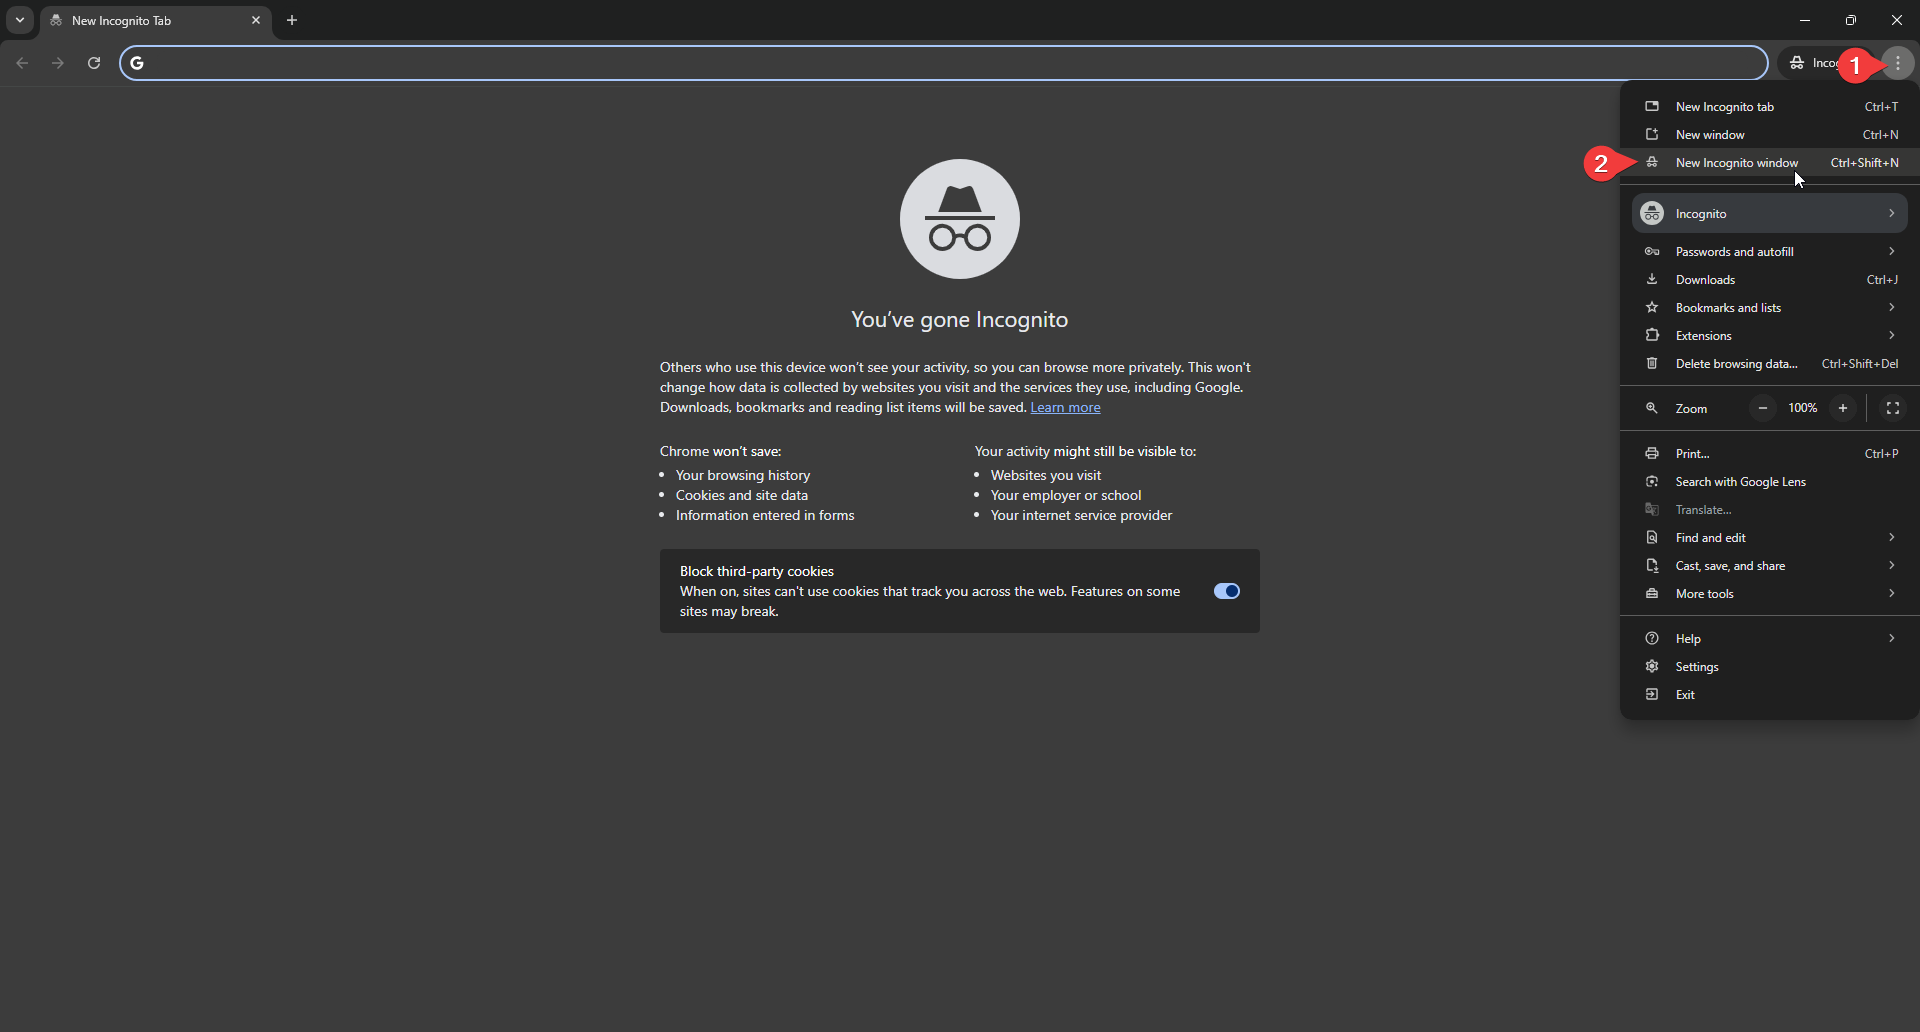
- Open the browser in the Incognito mode;
Click the "Ctrl" + "Shift" + "n" keys for opening Incognito tab in Chrome
Click the "Ctrl" + "Shift" + "p" keys for opening Incognito tab in Firefox
- Log in to your X (Twitter) account;
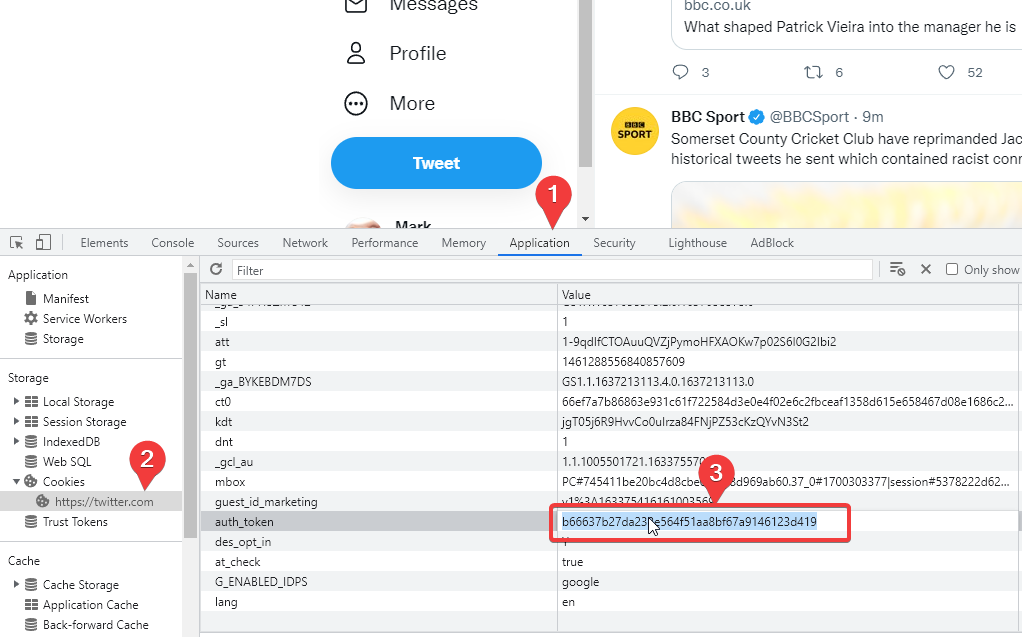
- Open the Inspect element panel by clicking the F12 key or right-click on the page and click the Inspect button;
- Go to the Application tab within the Inspect element panel and click the Cookies menu. Copy the auth_token cookie value and close the incognito tab without logging out of your account. If you log out, you will need to get new cookie values again;
- Go to FS Poster > Channels > X (Twitter) menu and click the Add channel button;
- Select the cookie method from the list, paste the cookie, and click the Continue button.
- You have the option to add the account with a Prxoy as well;

- Click the channel or the >> button to add it to the plugin;
By using this site, you agree to our Cookie Policy


