En
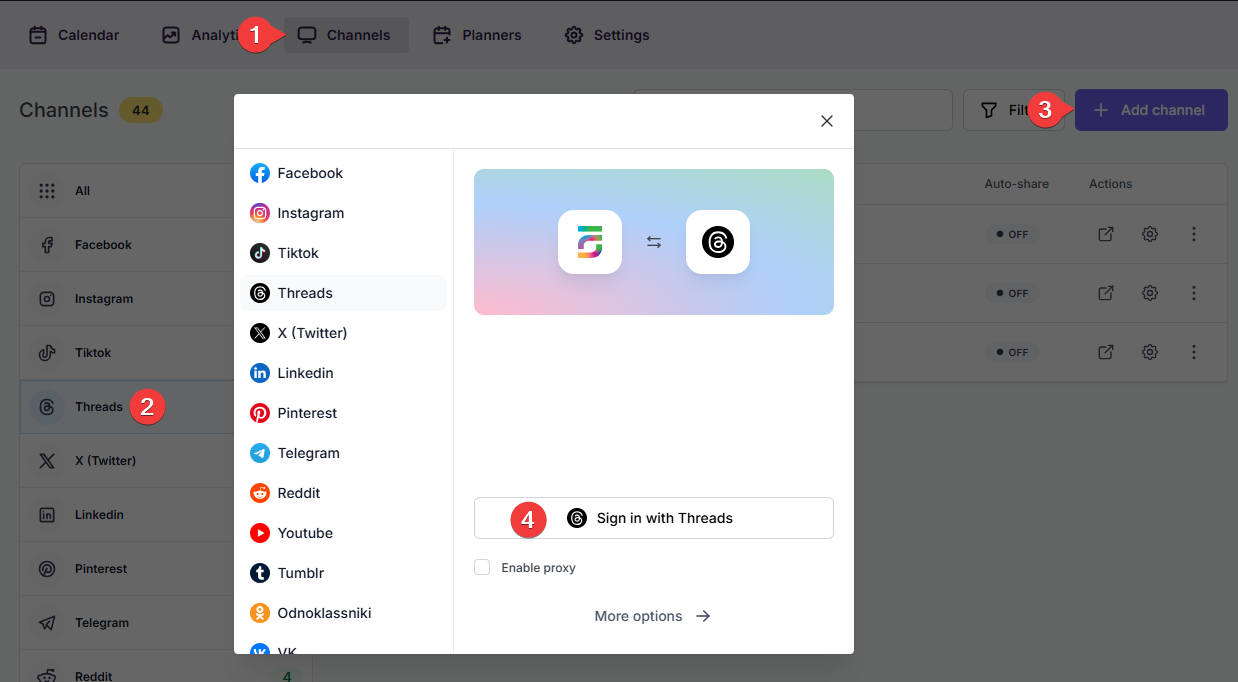
- Go to FS Poster > Channels > Threads menu and click the Add channel button;
- Next, click the Sign in with Threads button;
- You have the option to add the account with a Prxoy as well;
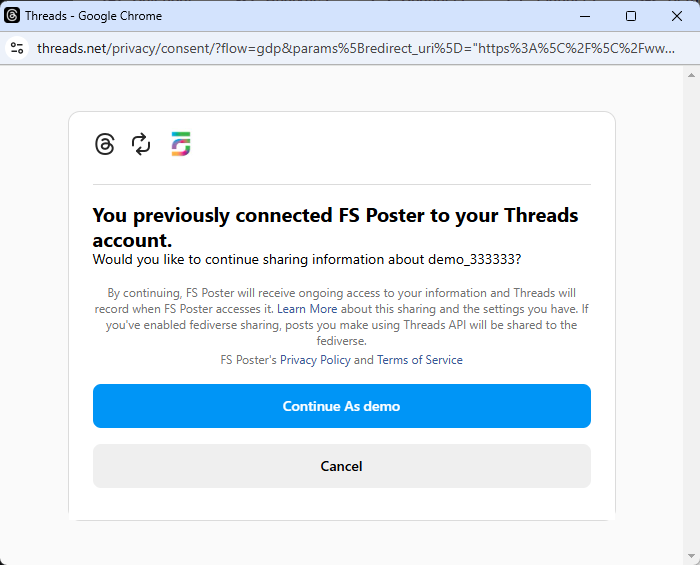
- When the Threads authorization page appears, click the Continue as (account name) button. The page will display the account name currently logged into the browser. If this is not the account you want to add to the plugin, or if you wish to add a different account, log into the desired account in a new browser tab;
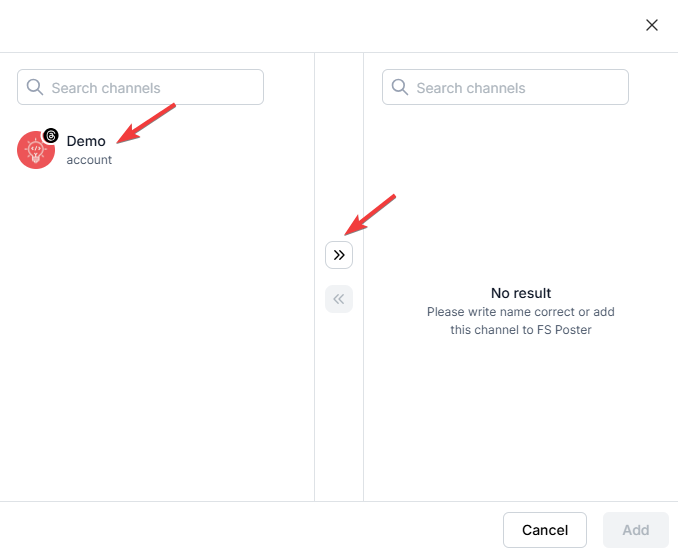
- Click the channel or the >> button to add it to the plugin;
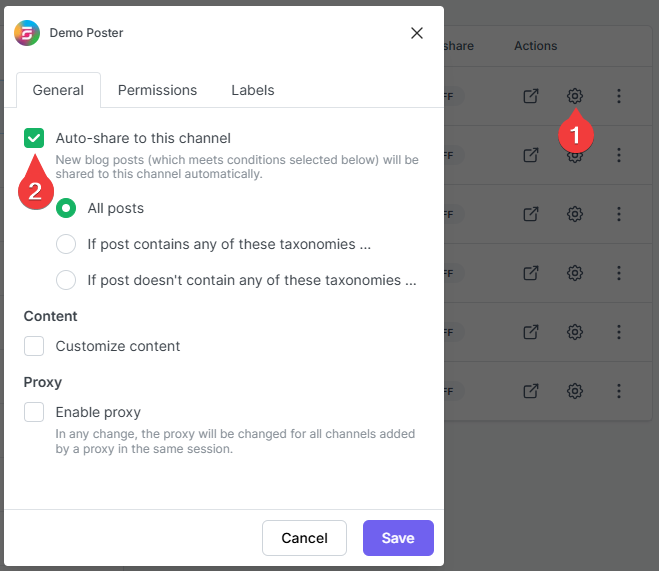
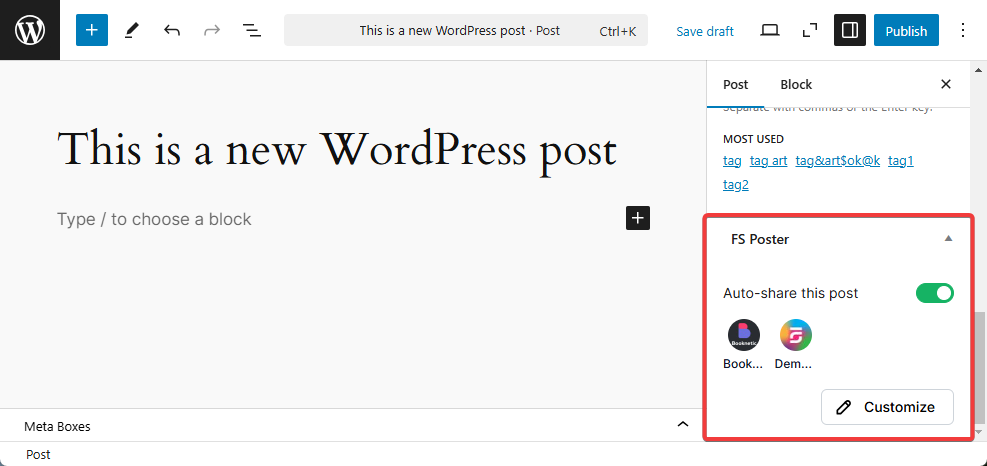
- Activate your channels to share posts on social networks automatically whenever a new WordPress post is published on your website. If you do not activate channels, you need to add them to the FS Poster section whenever you want to share specific posts on your social network accounts;
- You can also activate channels conditionally by selecting specific taxonomies to share specific posts or not share specific posts on particular channels. This will apply to only auto-posts;
- The Customize content option allows you to assign specific content for this specific channel which will override the content you specifically in the social network settings;
- Moreover, you can enable proxy or edit the proxy credentials without reauthorizing the channel to the plugin;
- Since channels are activated, they will appear on the FS Poster section when publishing a new WordPress post. Once the post is published, the plugin will share the post on these channels automatically;
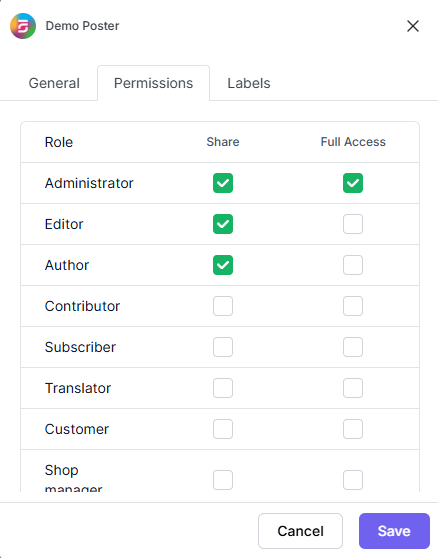
- In the Permissions tab, you can permit other WordPress users to use the channels in their FS Poster dashboard. You can either allow them to only share posts or give them full access to manage the channel, and edit its settings;
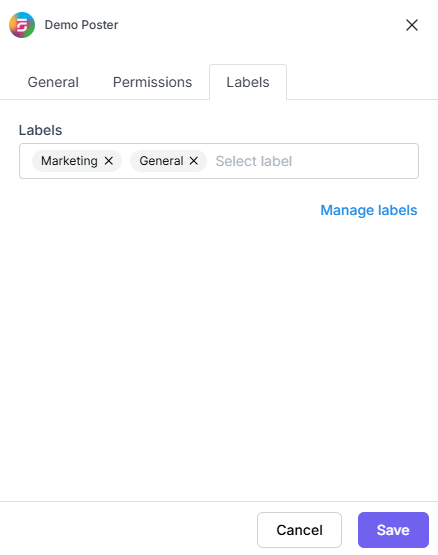
- In the Labels tab, you can organize channels into specific groups, making it easier to add a group of channels to the Planners or Schedules instead of adding them one by one.
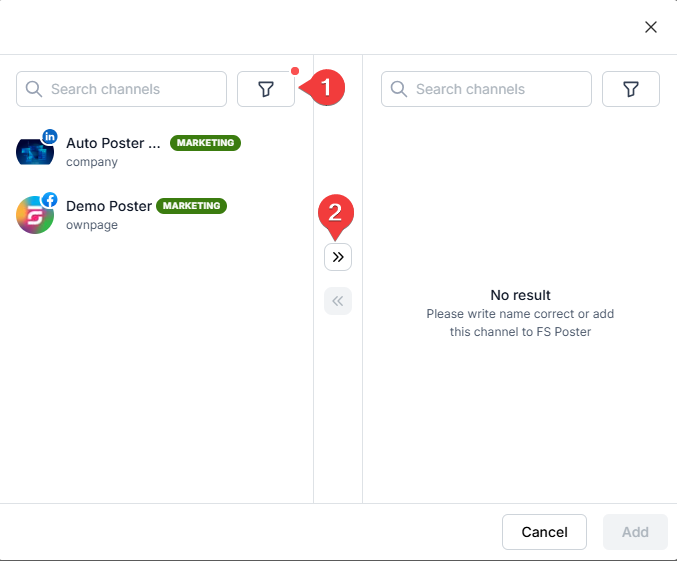
- Now, you can easily filter channels by label and click the >> button to add them all at once for sharing;
By using this site, you agree to our Cookie Policy


